

B. Thomas Cooper
Editor
I recently spent a couple of very short hours advising some rather talented friends of mine on the fine art of properly ‘micing’ a guitar cabinet for recording. Over the course of the evening it occurred to me even the finest seasoned musicians can use a refresher course on common sense every now and then. Myself included.
Fortunately, this group of guys tend to be sensible by nature, a rare commodity for musicians as a whole. Our goal was to record ‘scratch tracks’ of the lead guitar lines for two tunes, and ‘keeper tracks’ for a third. We were recording in Sonar Studio Pro, I believe, an inexpensive, but highly recommended digital recording software.
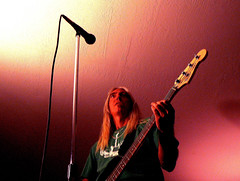
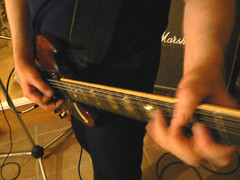
Scott, the guitarist for the project attended the ‘old school’ of ‘big rock‘, if you catch my drift. We’re talking the classic, early sixties Gibson SG through a Marshall half stack. Of course, the Marshall ‘four twelve’ cabinet needs to be kicked pretty hard, just to get the old girl to bark. (translation: the amplifier needs to go to eleven) This is where our story really begins.
We are set up in a living room, with the computer and various interfaces off to one corner. The Marshall amplifier has been rolled into an adjoining bedroom. The occupant of room, along with his pet Salamander, have been given the boot.
We set the cabinet in the bedroom pointing the speakers toward the right side of the corner, across the length of the bed. We are careful not to point the cabinet directly at the wall, or directly into the corner, as both may produce unwanted response. Sound travels much like water. A pebble in still water will create even concentric ripples, whereas a larger stone is apt to make quite a splash.
At higher decibels, sound also tends to make quite a splash. Especially so, in cramped quarters. One of our greatest concerns will be avoiding the afore mentioned, and truly dreaded ‘square wave’.
The cabinet is about three feet from the edge of the mattress, at perhaps a forty degree angle. It is obvious the old Marshall tube amp will not produce the desired tone at a lower volume, so we don’t even drive down that alley.
Instead we concentrate on controlling the physical properties of sound.
A small collection of throw pillows are arranged on the edge of the mattress to create very subtle baffling. I don’t throw a blanket, or any other object around the cabinet. It normally isn’t necessary.
Next comes the actual ‘micing’ technique. ‘Micing’ is the term used to describe the process of microphone placement. More often than not, microphone placement is a forgotten art form. It is a process often neglected, or simply misunderstood.
There are no hard and fast rules. Use your imagination. That having been said, let’s discuss our situation before progressing any further. Simple guitar tracks, right? Perhaps.
One microphone, or two please? Would you like your sound dry and boxy, or would you prefer a tad of ambience? In other words, do we place the microphone close to the speakers, or far away. How close, or how far away, and why? Does the type of microphone make a difference?
For this situation, I highly recommend an ordinary, medium priced Dynamic microphone. Nothing fancy, mind you. Here’s my reasoning. The polar pattern of most dynamic stage mics responds most favorably within five to fifteen inches of the sound source. Get much closer, and the mic starts to get a little punchy. Back off too far, and the mic doesn’t reproduce transients. Transients are those are the little things, the stuff of which your sound is made of. We really don’t want to lose them in transmission.
The cabinet we are ‘micing’ contains four standard twelve inch Celestion speakers. Our goal is to place the mic close enough to catch the little things but far enough so as not to do the freak. Here’s a few quick don’ts. Don’t ever drape the mic over the front of the cabinet. Sound doesn’t work that way. Don’t ever put the microphone directly against the grill cloth or speaker.
Don’t ‘mic’ the center of a four twelve cabinet, and don’t point the microphone directly at the center of the speaker. That round looking thing in the center of the speaker, well, that’s a dust cover. It does not reproduce sound. Whenever possible, aim the microphone at an angle parallel to the paper of the speaker cone.
We set the mic about s foot or so from the cabinet, and after a quick listen, we moved the microphone forward perhaps two inches. It was all very simple, and very productive. Very little time was squandered twittering knobs and wiggling stands.
The session was a success on multiple fronts. Scott got to keep his tone, and Jon, the producer, got to keep his sanity. It was a pleasant evening for all. The moral to this story? Think about what you are trying to accomplish, take your time, keep it simple, and by all means, enjoy the process.


2 comments:
Hello. And Bye.
Yes, correctly.
Post a Comment